Product photography can make or break your online sales. We all know that photography is an integral part of ecommerce. But there’s another secret weapon that often goes unnoticed: product photography retouching. It’s like the magician’s touch that can transform your digital storefront into a captivating display that shoppers can’t resist. Home improvement products can especially benefit. With the right touch, you can showcase your craftsmanship, design and quality. Through the power of Photoshop, your product can go from being just another unappealing item on the digital shelf to a must-have product that shoppers won’t be able to resist.
Before we get into the nitty-gritty, let’s set the record straight: Retouching isn’t about distorting reality, it’s about enhancing the natural beauty of your products, fixing imperfections and making them look their best. Your goal shouldn’t be to make major changes using retouching; it’s all about making your digital shelf as attractive as possible without crossing the line into an AI Photoshop mess. And rather than being a laborious process that will stretch your budget, it can even save you money by streamlining your photography process and getting the best bang for your buck. In this article, we’ll dive into how product photography retouching can supercharge your digital sales.
Before you do anything, your first step should be to start with a professional photographer with proper lighting. Be sure to check with your online retailer to make sure that you adhere to any specifications they may have before shooting, too. Where do you go from there? Let’s jump in.
Step 1: Make your product the hero.
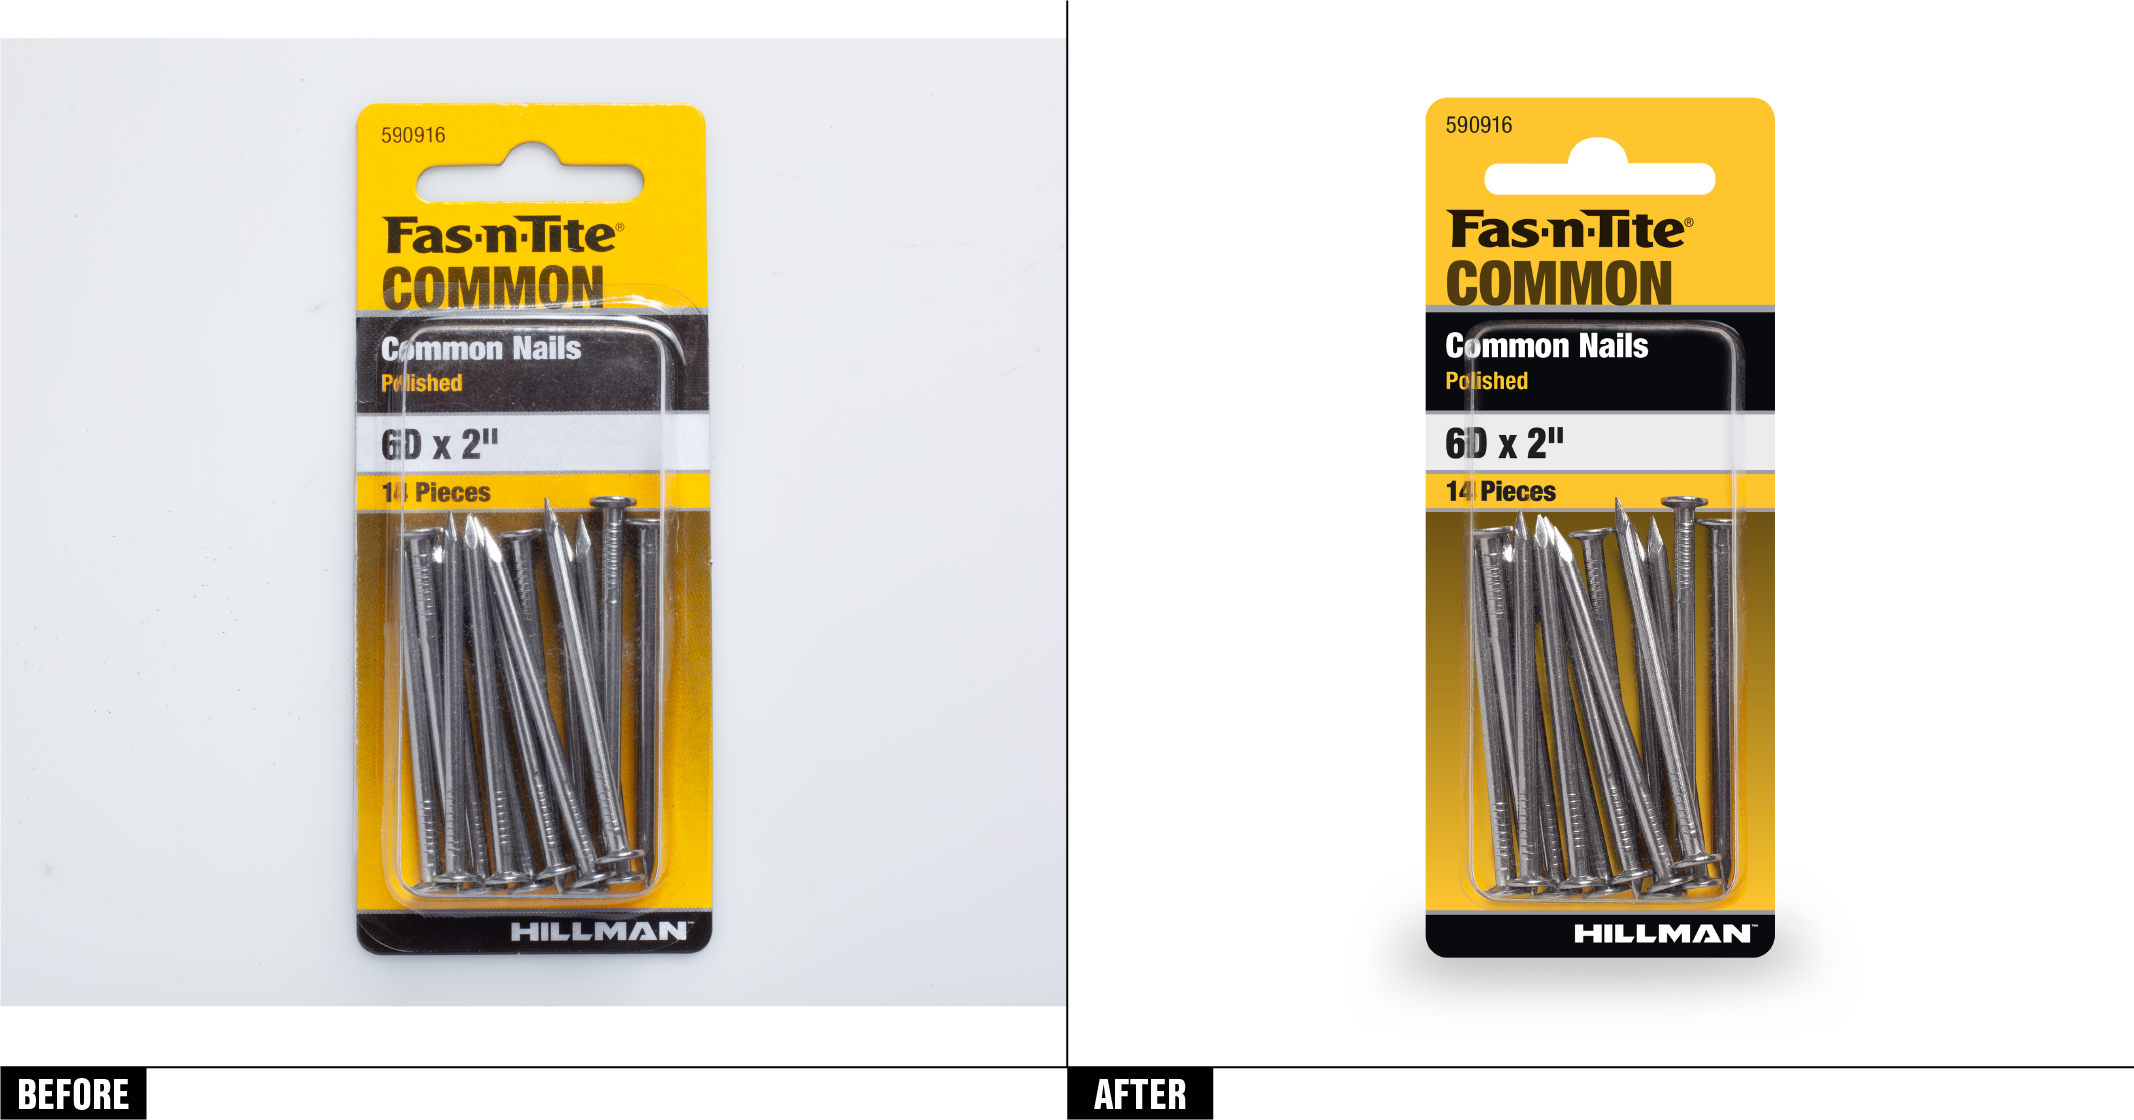
Above all, your product is the star of the show. Capture your product with good lighting and from the most powerful, appealing angle. Shooting the product from a high angle will make your product look small and humble. Bringing the camera down to shoot from a low angle will make your product look heroic, as we’ve done with the Fas-n-Tite packaging above. Just take care not to lose the overall scale in the final picture. Make sure your product is front and center, filling the 1000×1000 frame with its glorious details.
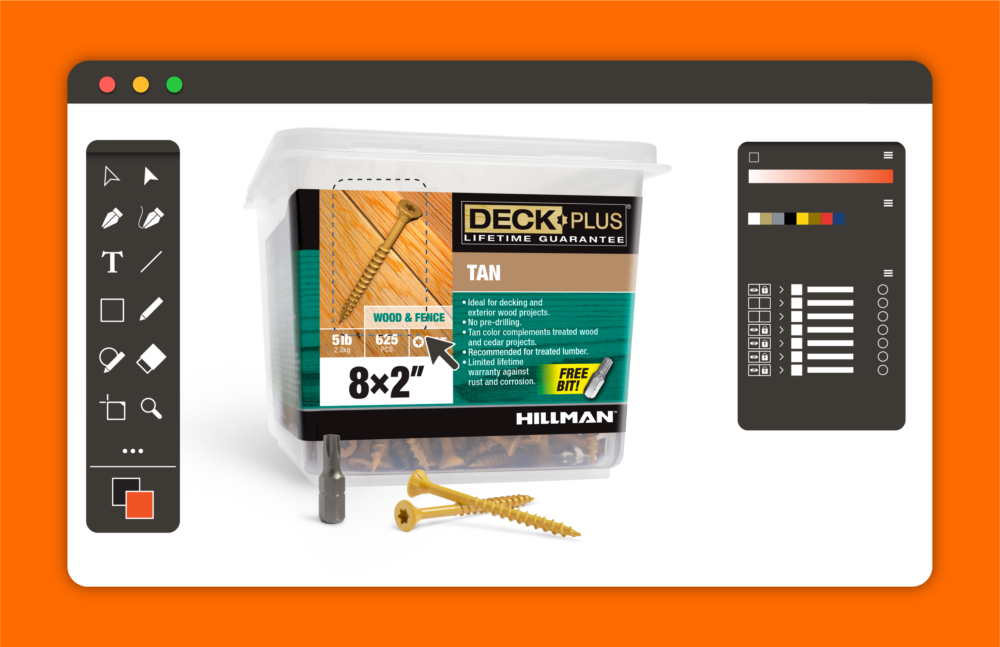
Step 2: Isolate the product.
Clip your product from its original, photographed backdrop and place it on a 100% white background. That’s what we’ve done here with DeckPlus packaging. This instantly elevates your product and gives it a professional, polished look.
Step 3: Remove imperfections.
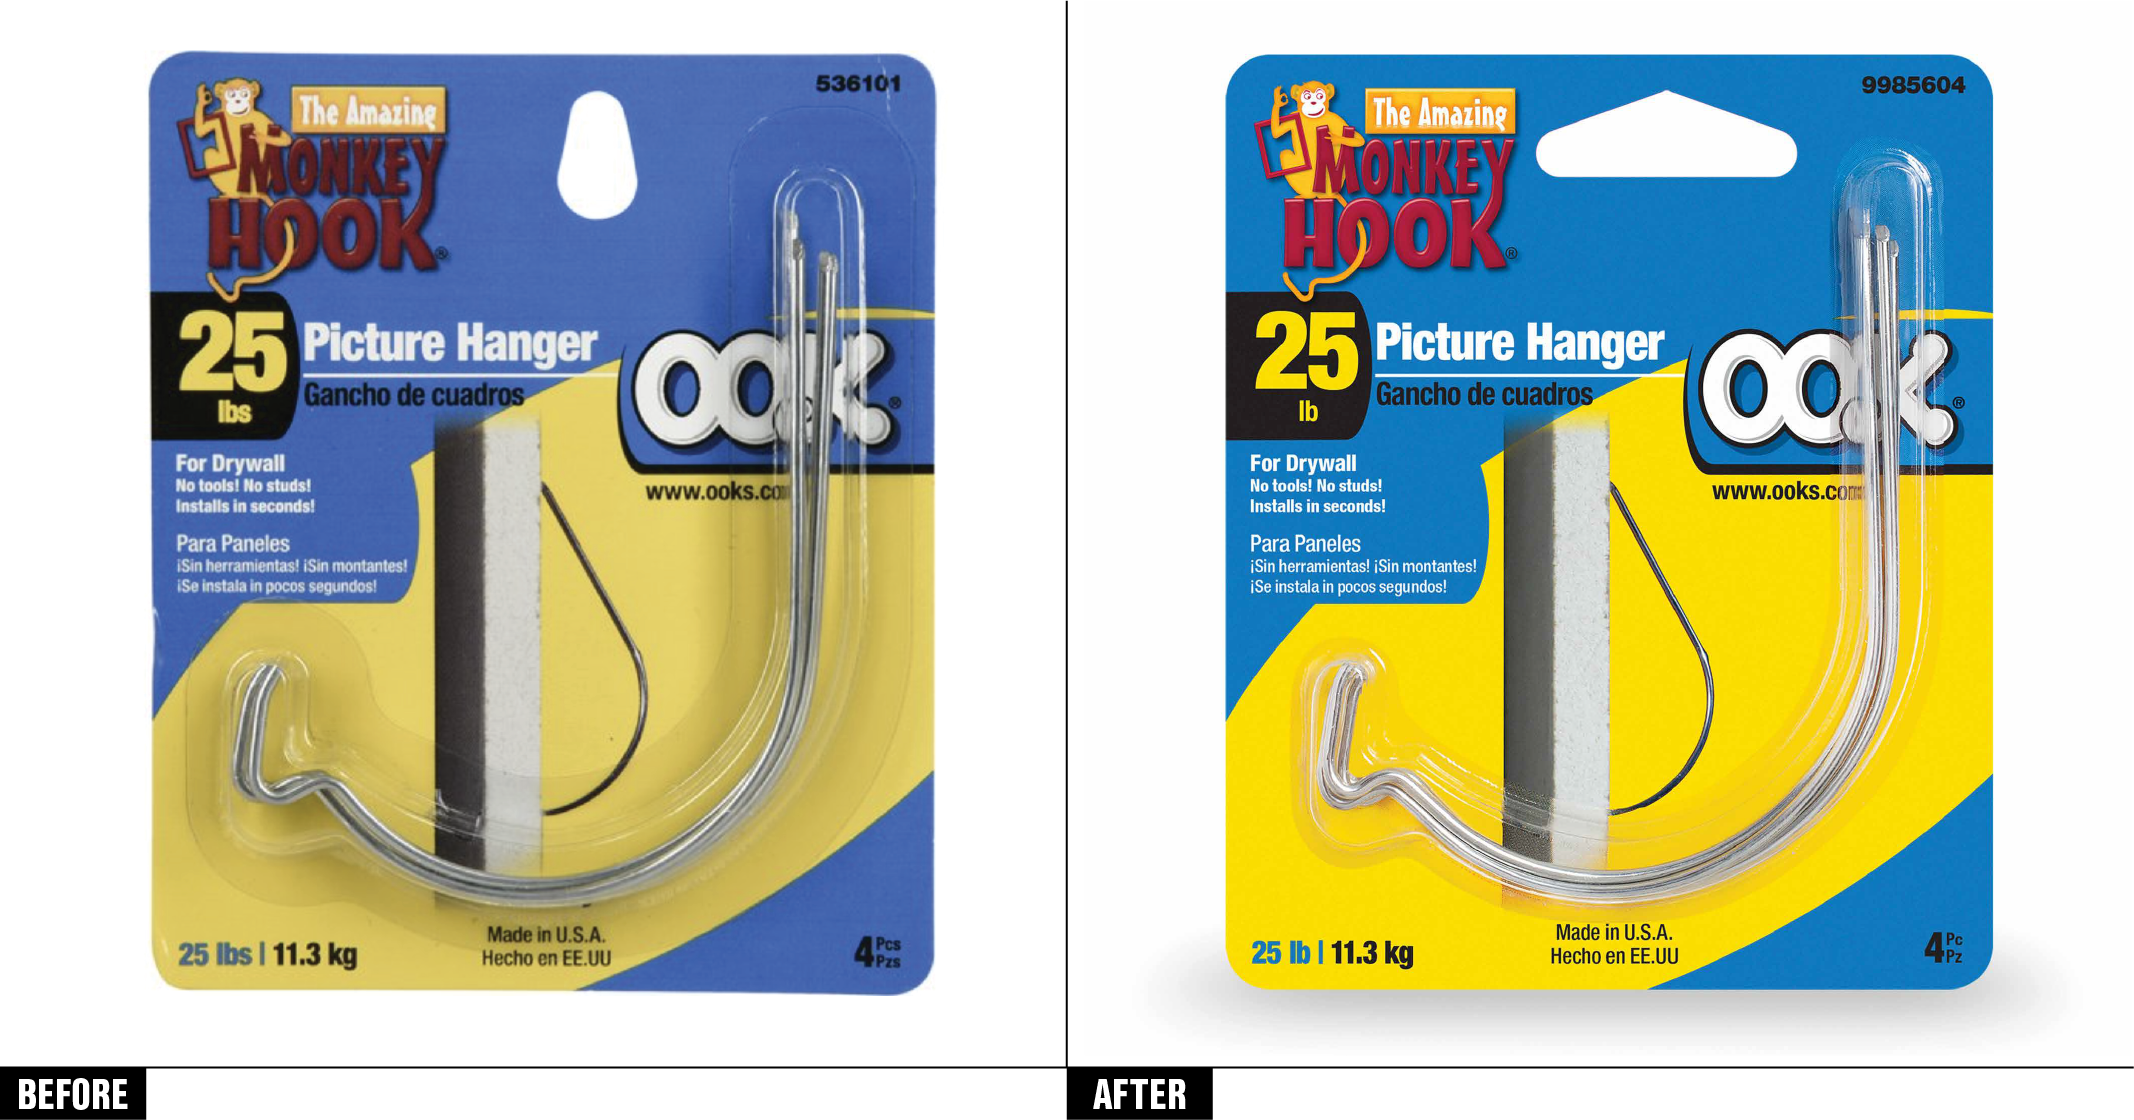
Even in product photography, speckles, spots and distortions still happen. Luckily, you can use retouching to smooth out any bends, buckles, tears and so much more on your product, as well as warped external packaging or scuffs. As you can see with our OOK reshoot here, our aim is for the customer to see your product without getting distracted or confused about what’s included with your product.
Step 4: Bring it all together.
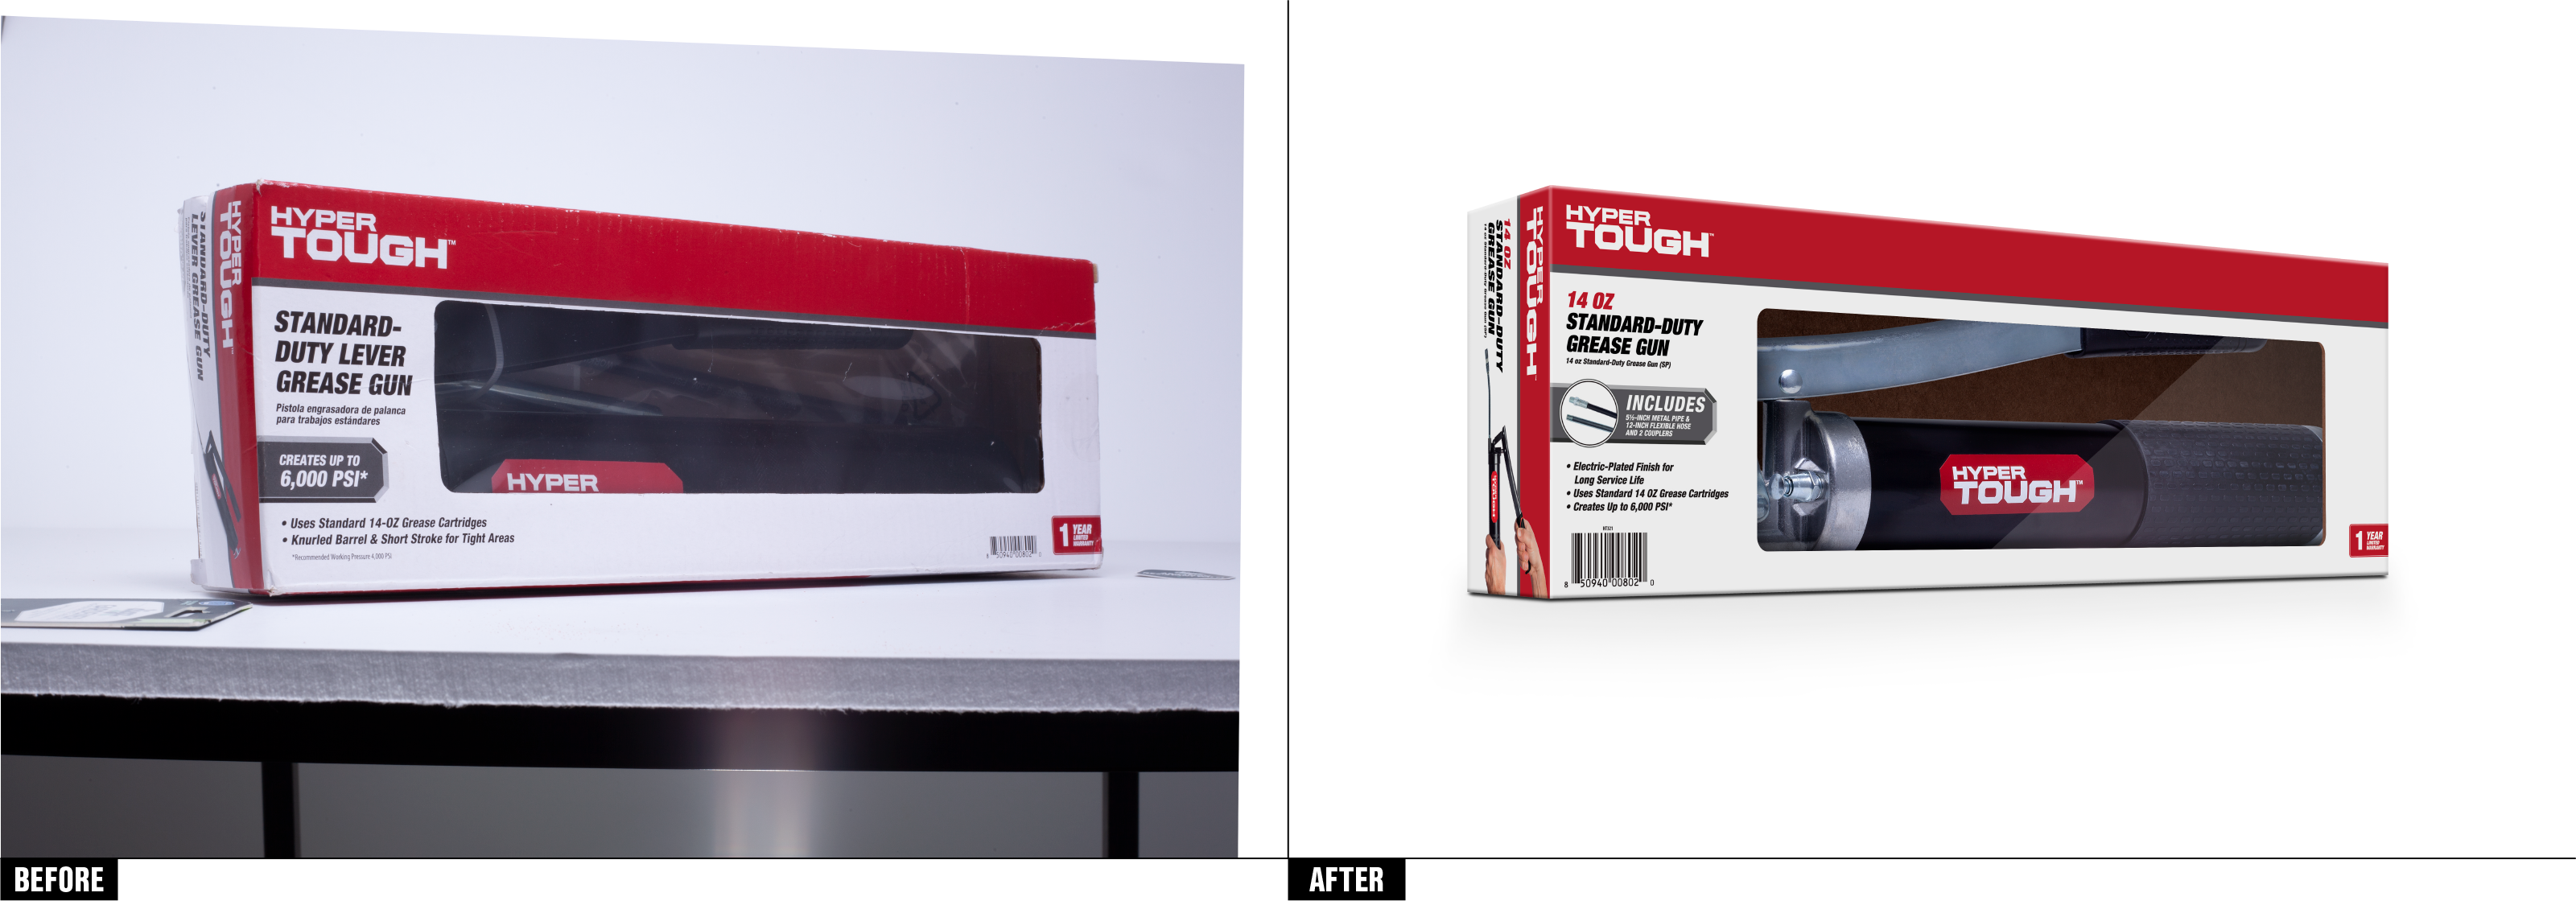
Replace all labels/design artwork on your product with the original (non-photographed) design. You’ll then “layer” these images back into the ultimate image using the digital art packaging files. For example, you might need to remove the packaging during the shoot, especially if it’s clamshell or plastic wrap, to shoot the product without glare and give it added legibility, as we’ve done here with our Hyper Tough packaging. This will allow the images and typography that you’ve worked so hard on to really shine on the digital shelf.
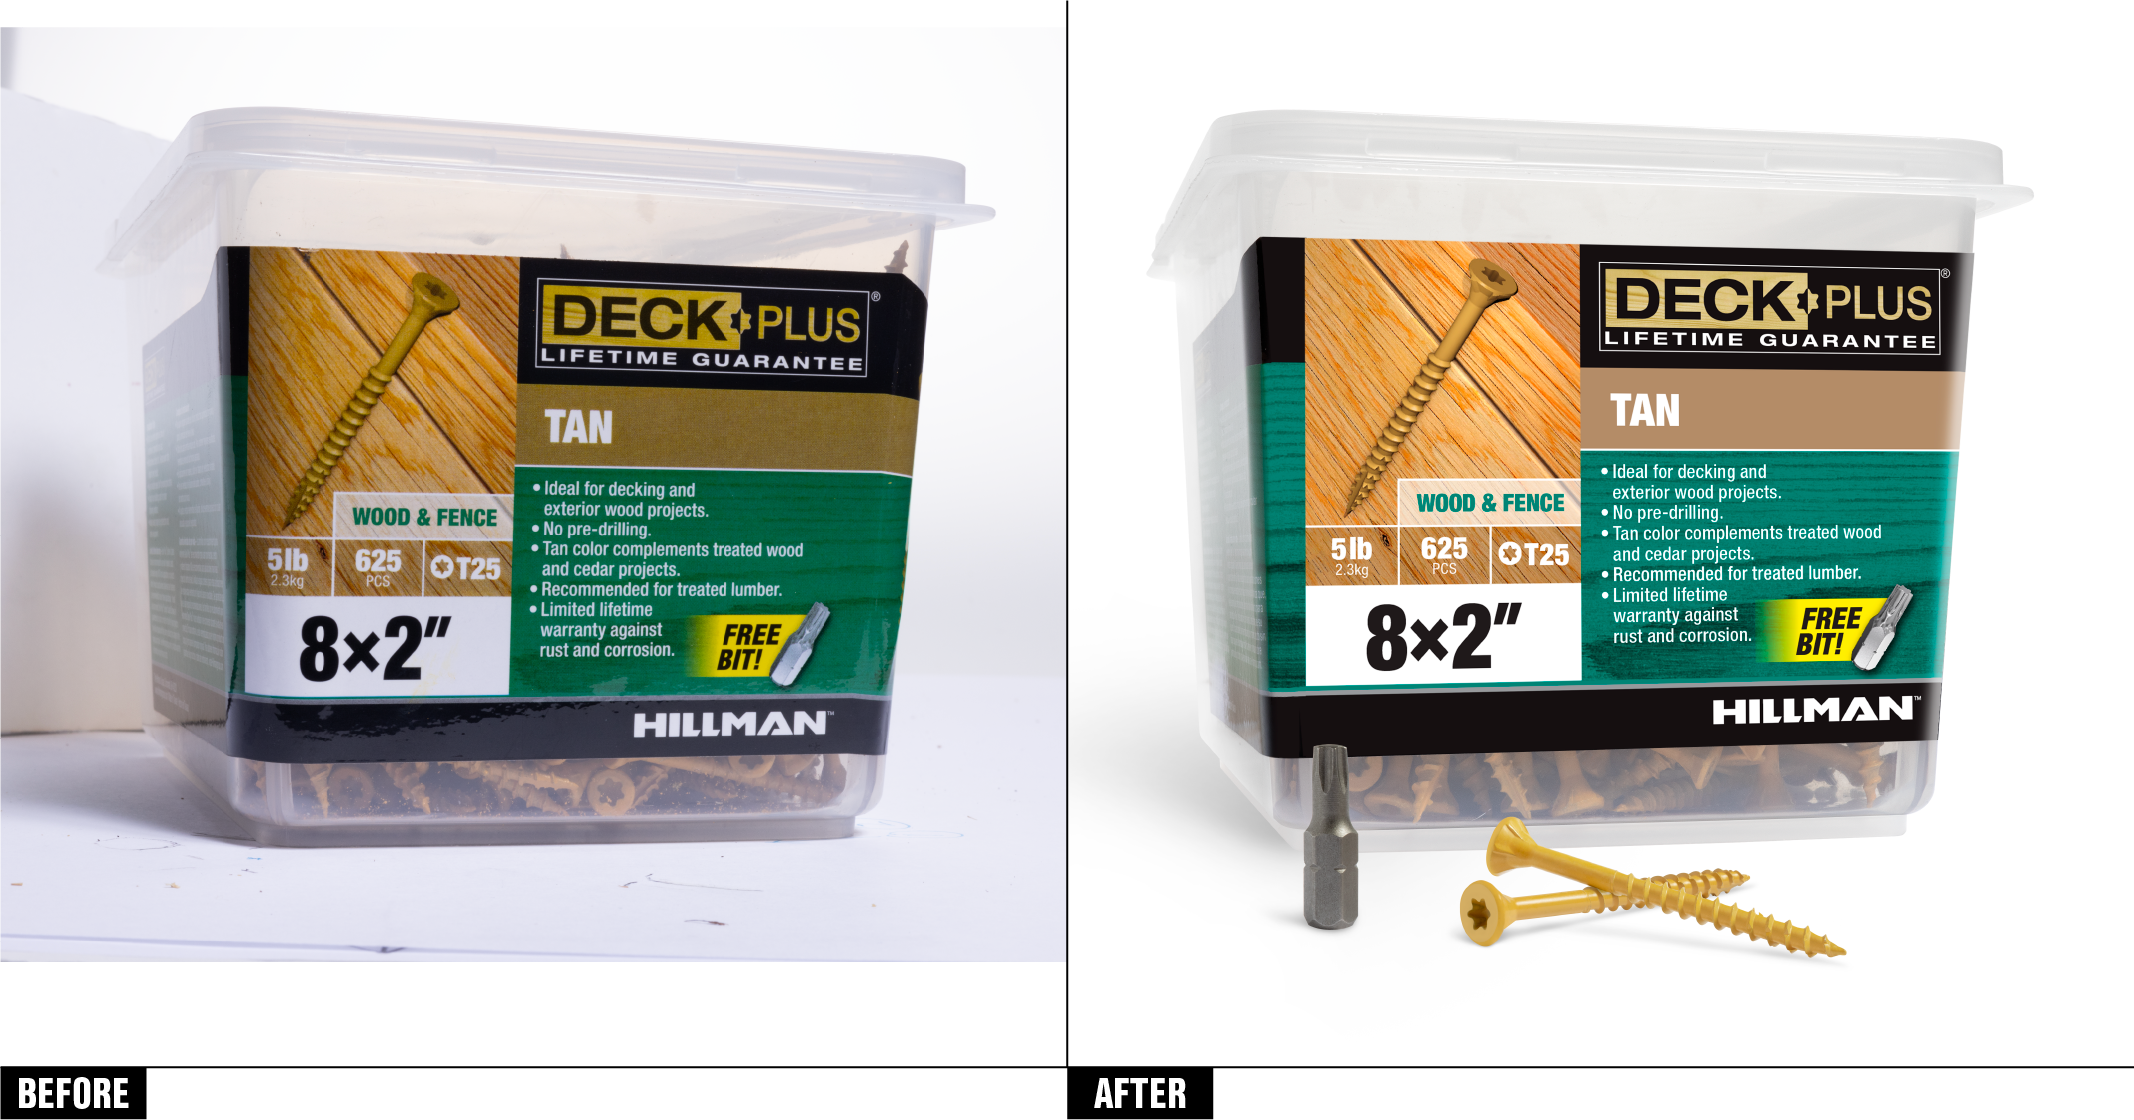
Step 5: Rebuild shadows on a white background.
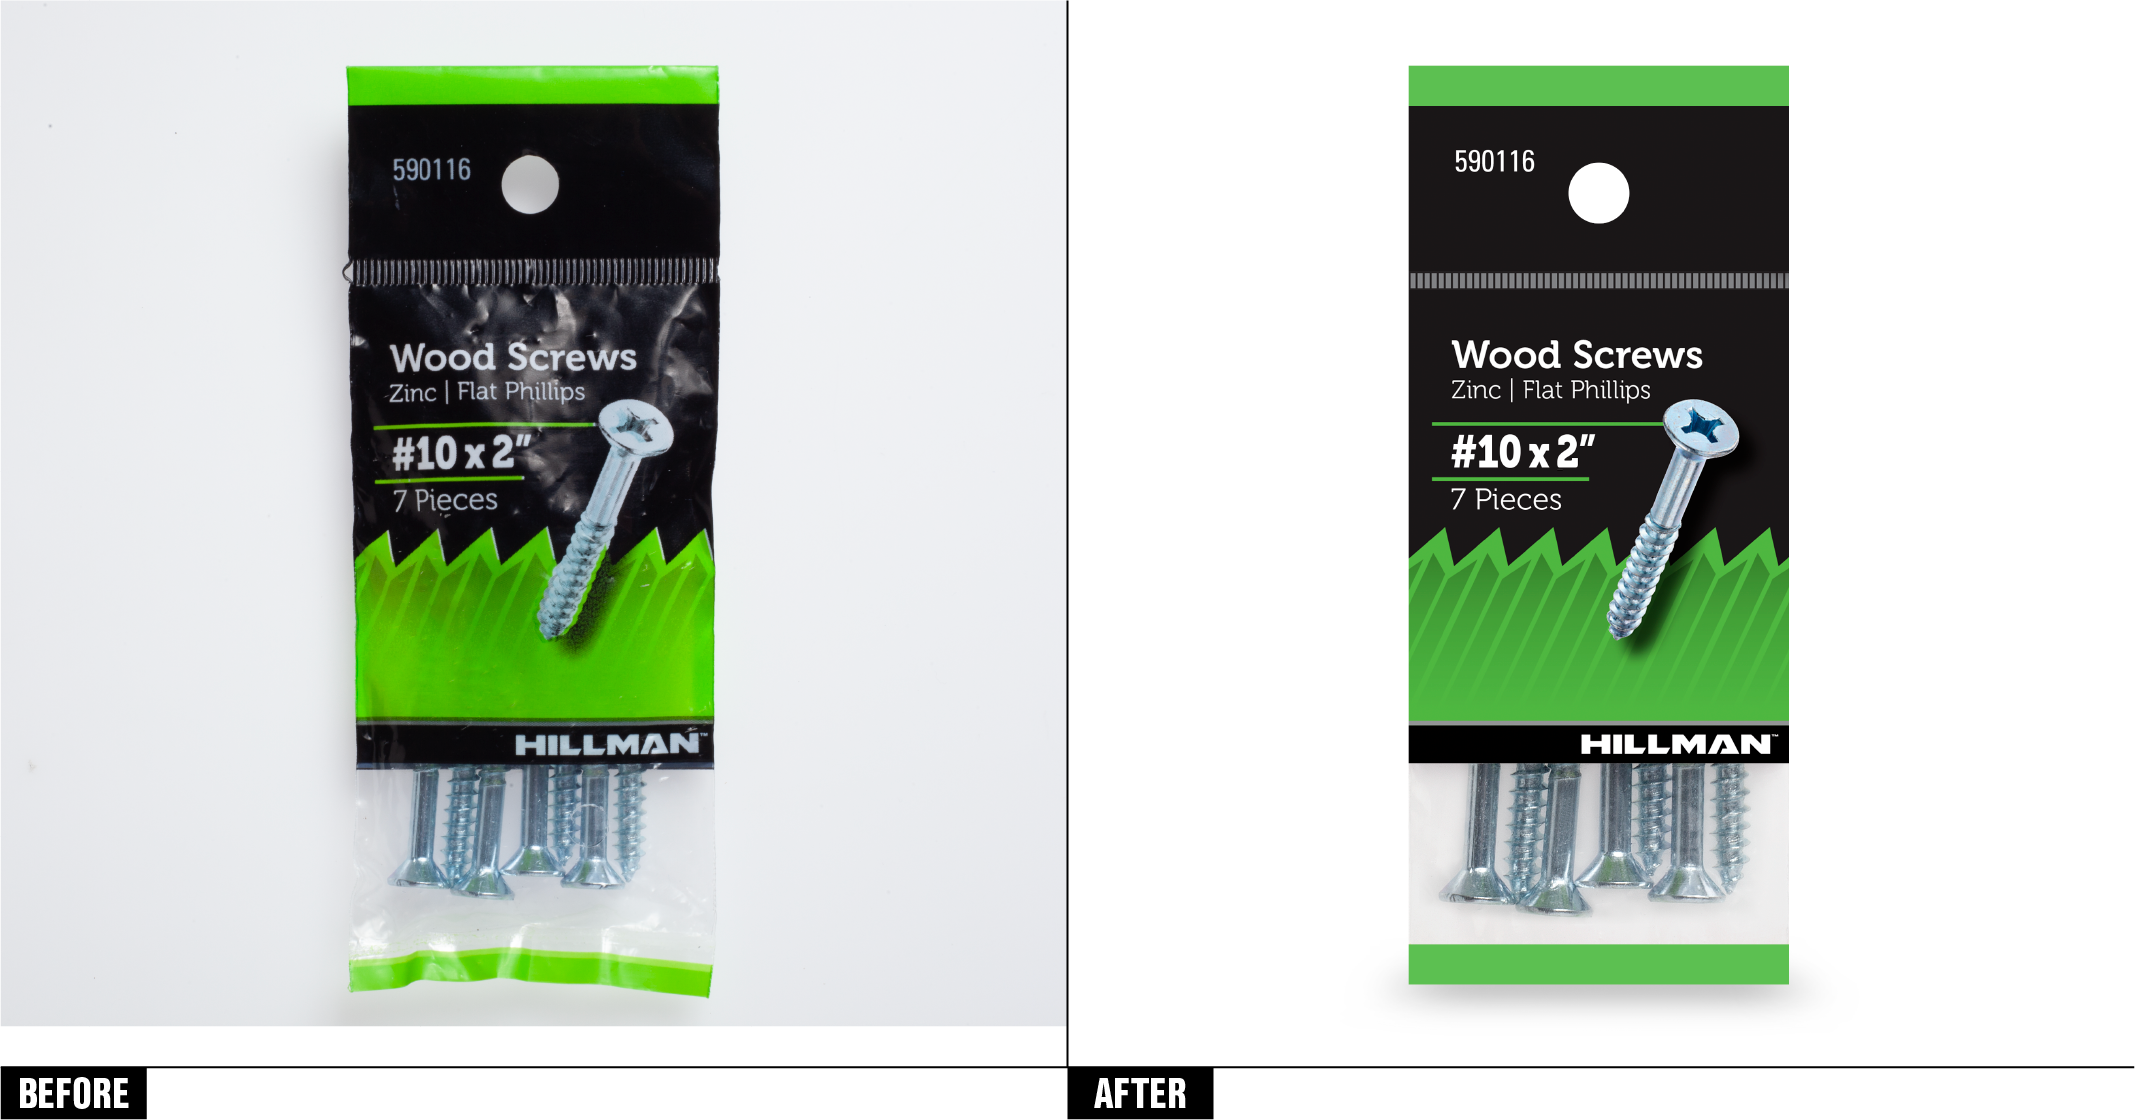
Soft, subtle shadows consistent with your photography’s lighting are the secret sauce that will make your product shine. Using Photoshop, create a grounding shadow that not only adds depth, but also shows that your product isn’t just floating in space. Be consistent with your lighting and keep those shadows heading in the same direction so you don’t disorient your potential customers, as we’ve done with the Hillman packaging here.
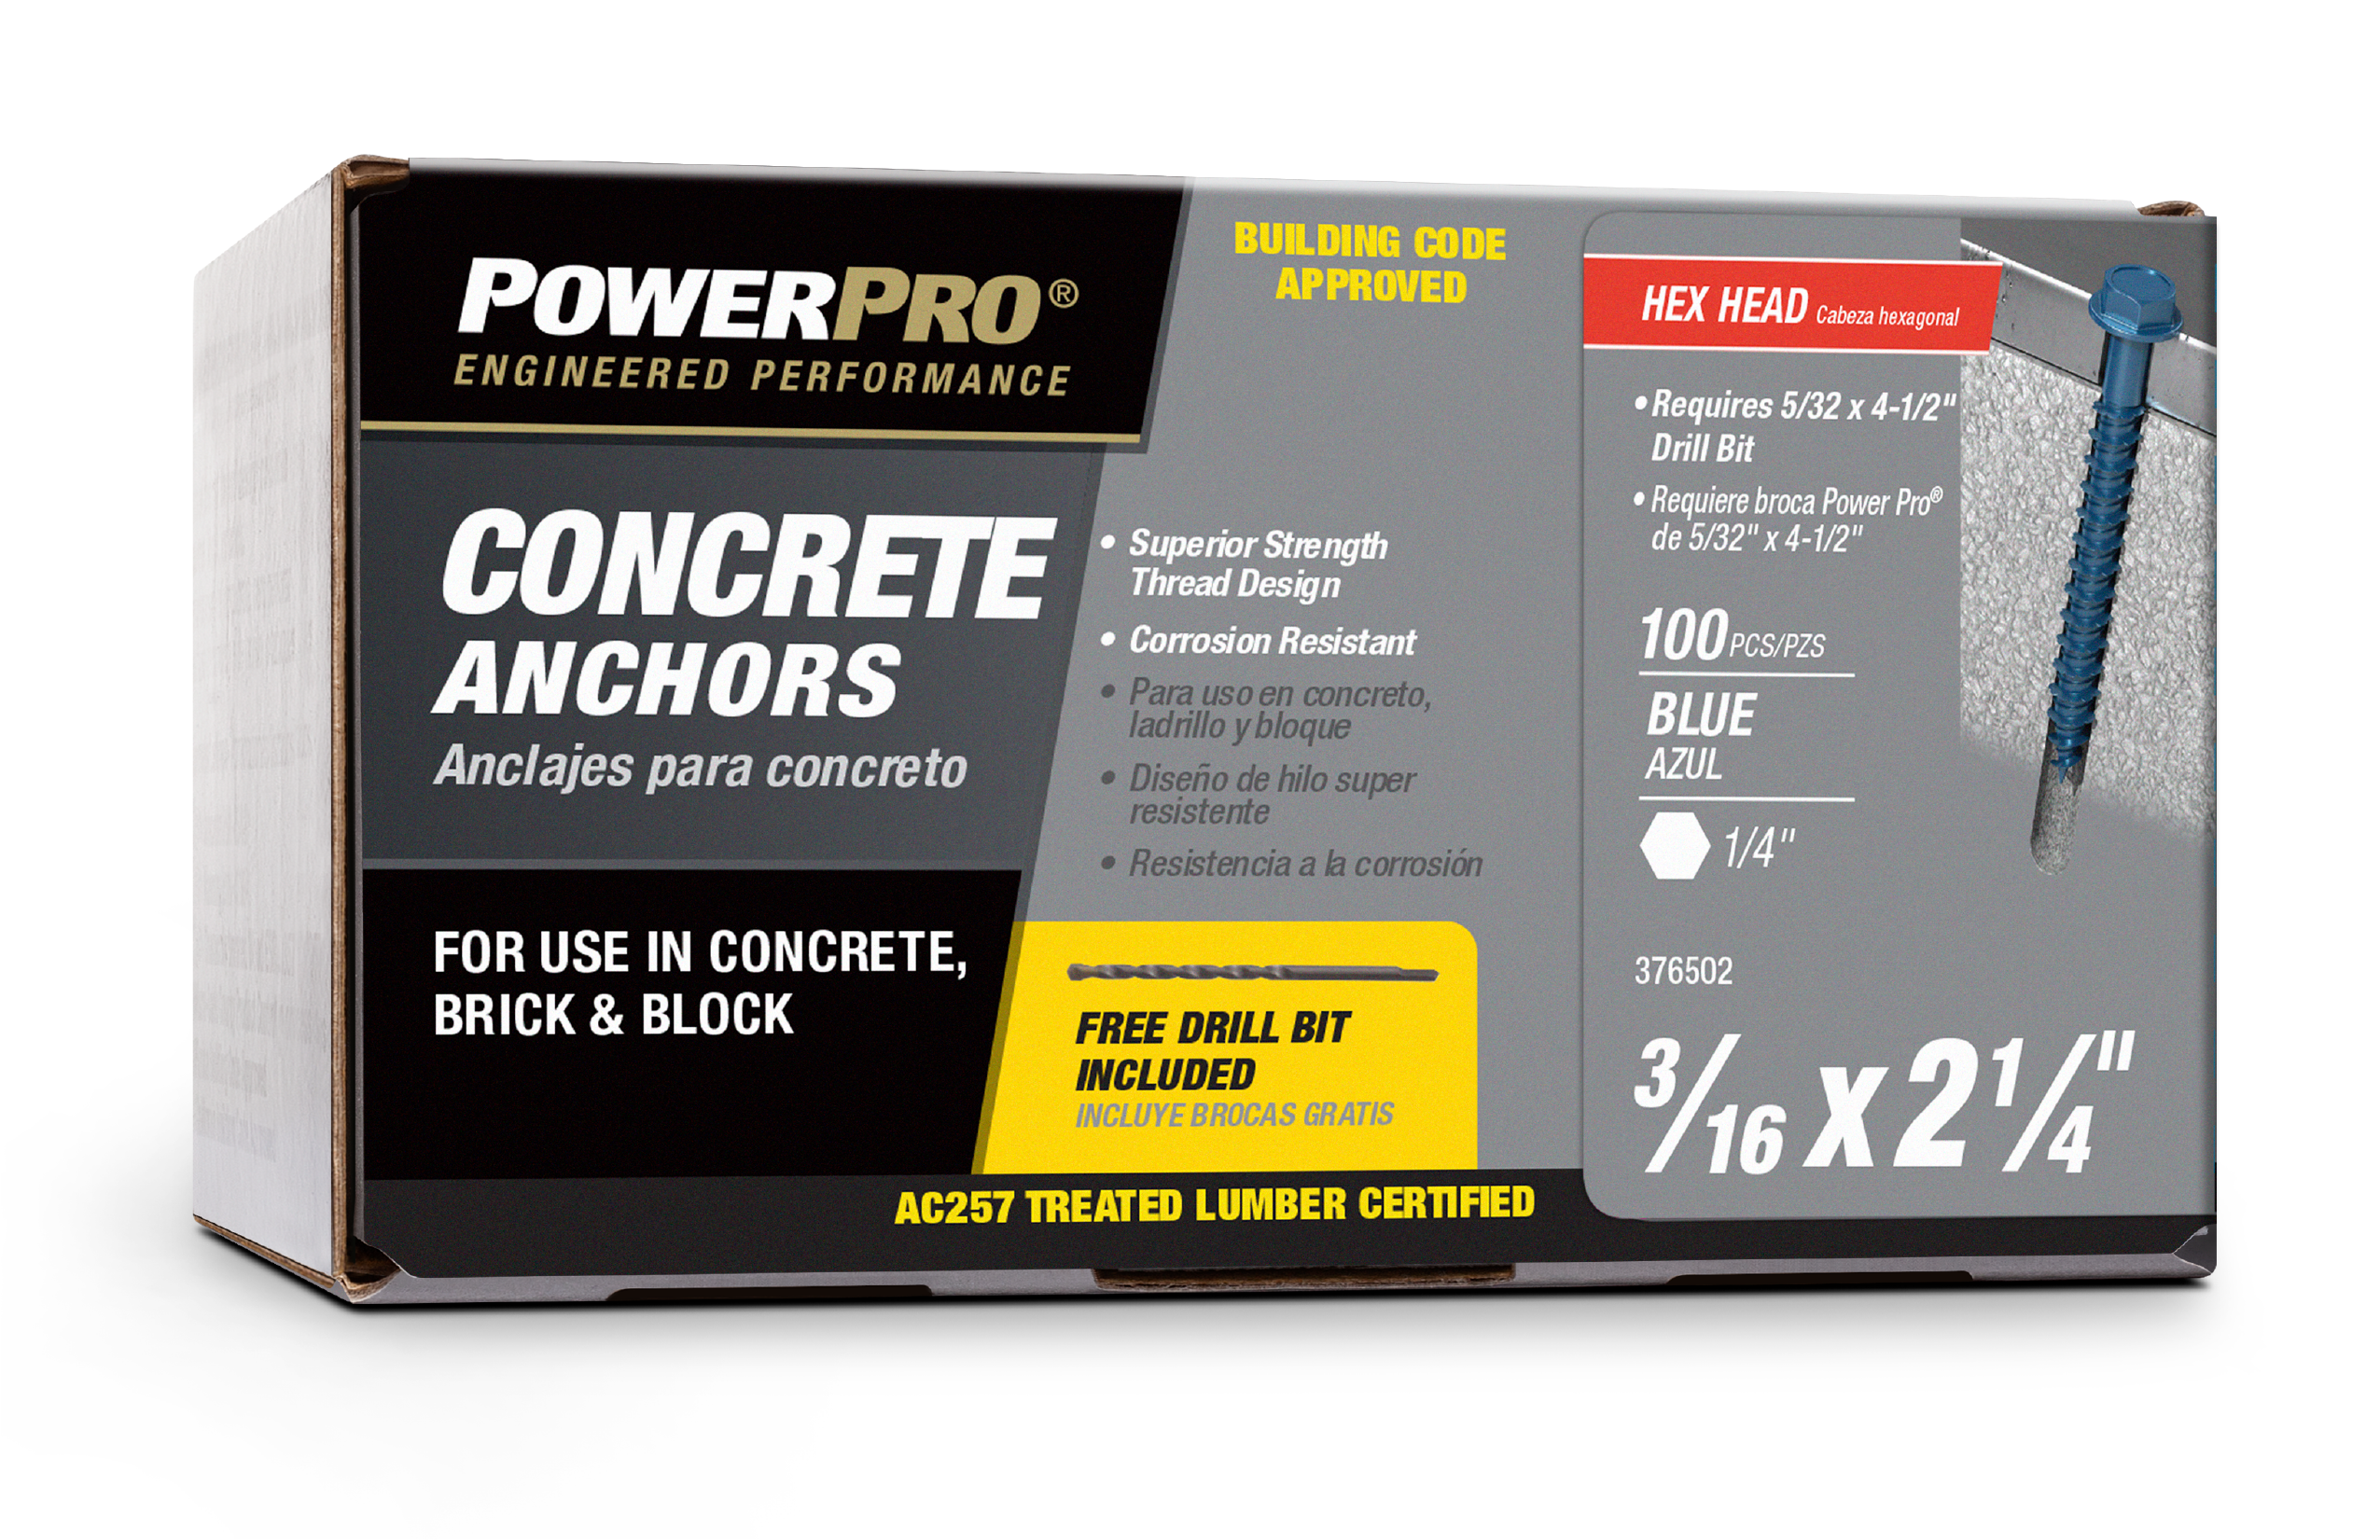
Step 6: Give your product some realism.
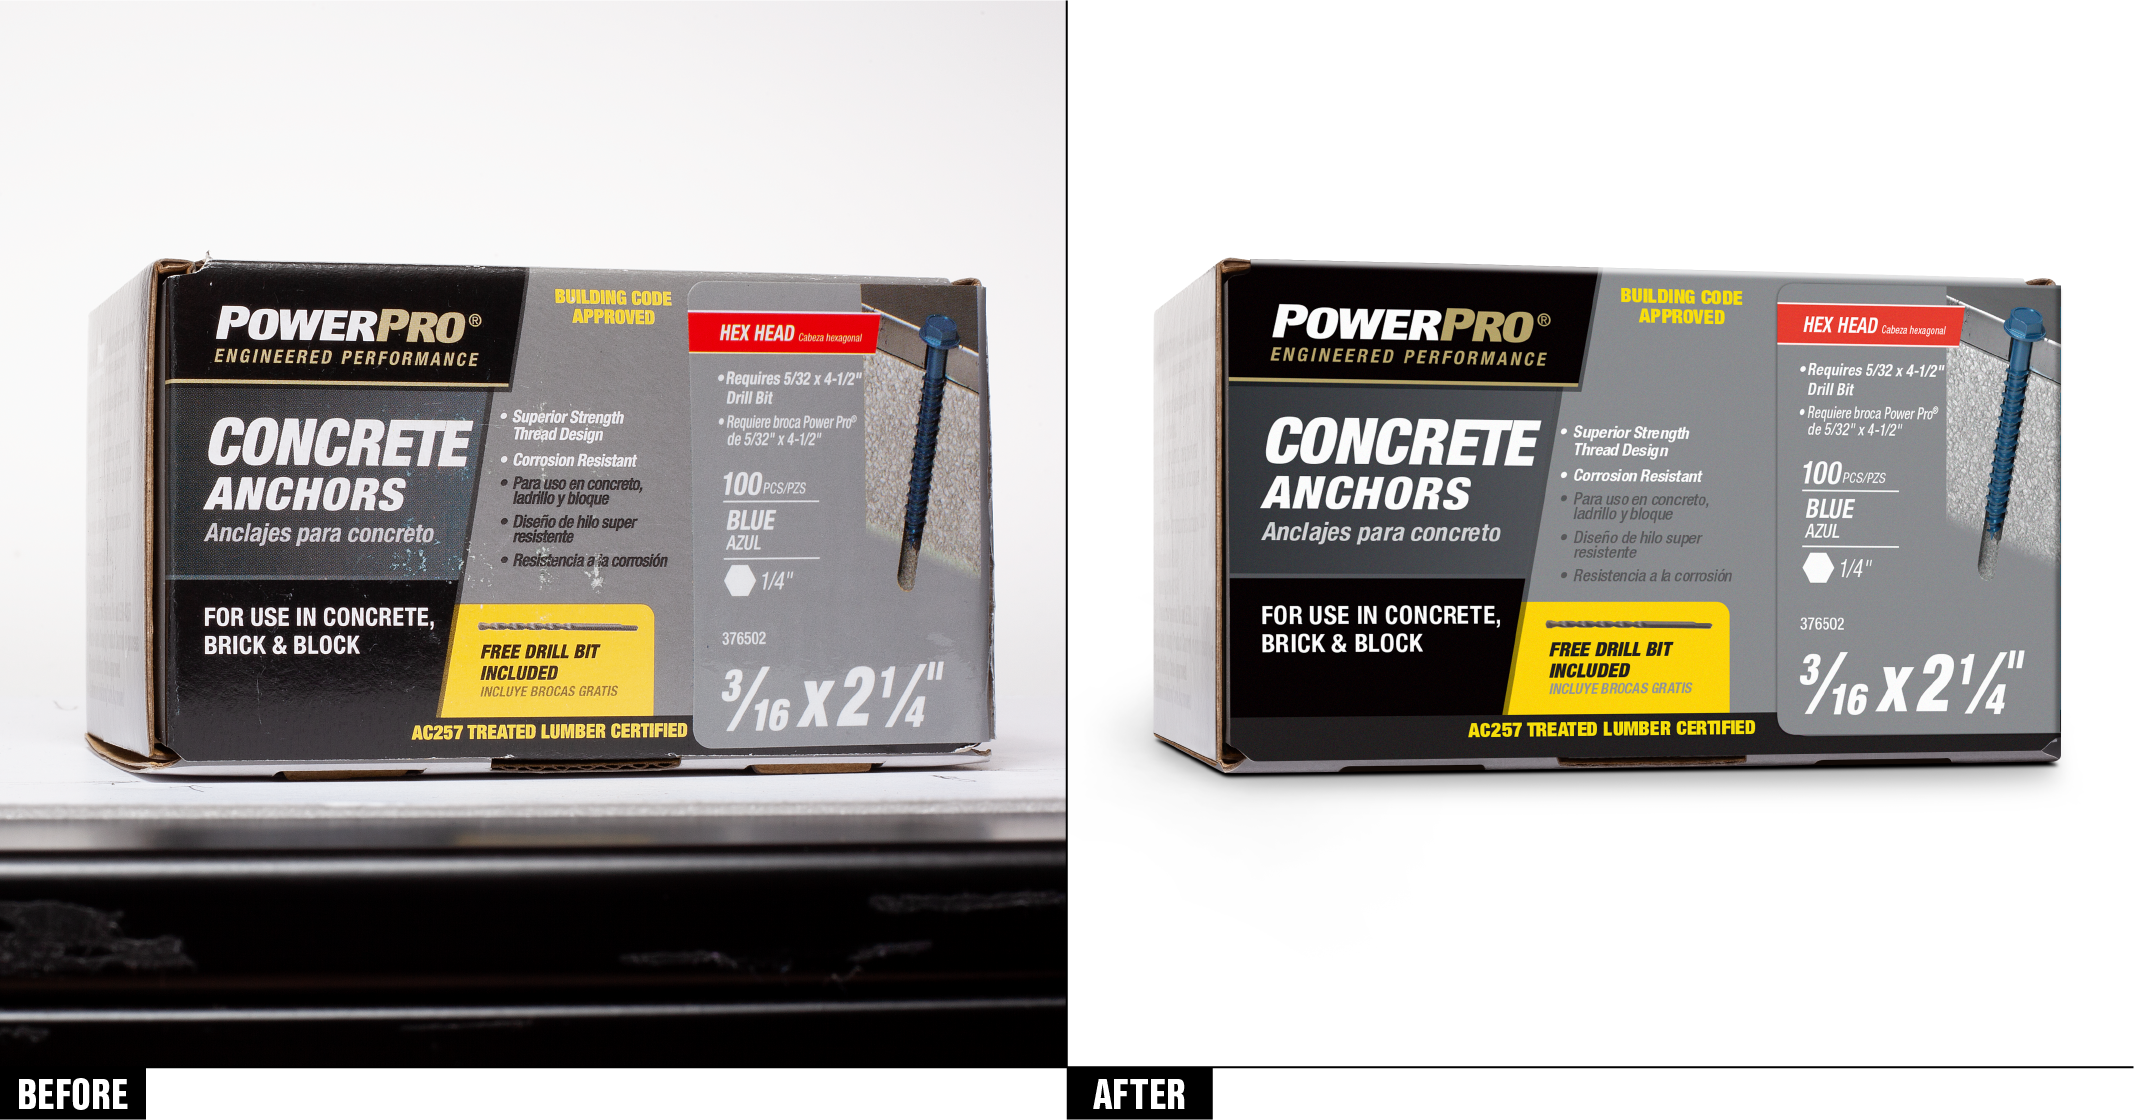
Once you’ve composited all your files into one file, your product may look flat and unrealistic. In your photo editing software, add some subtle noise and barely noticeable shadows to give the product a more tactile, better-than-real feeling. See our PowerPro packaging for reference.
Step 7: Fix color.
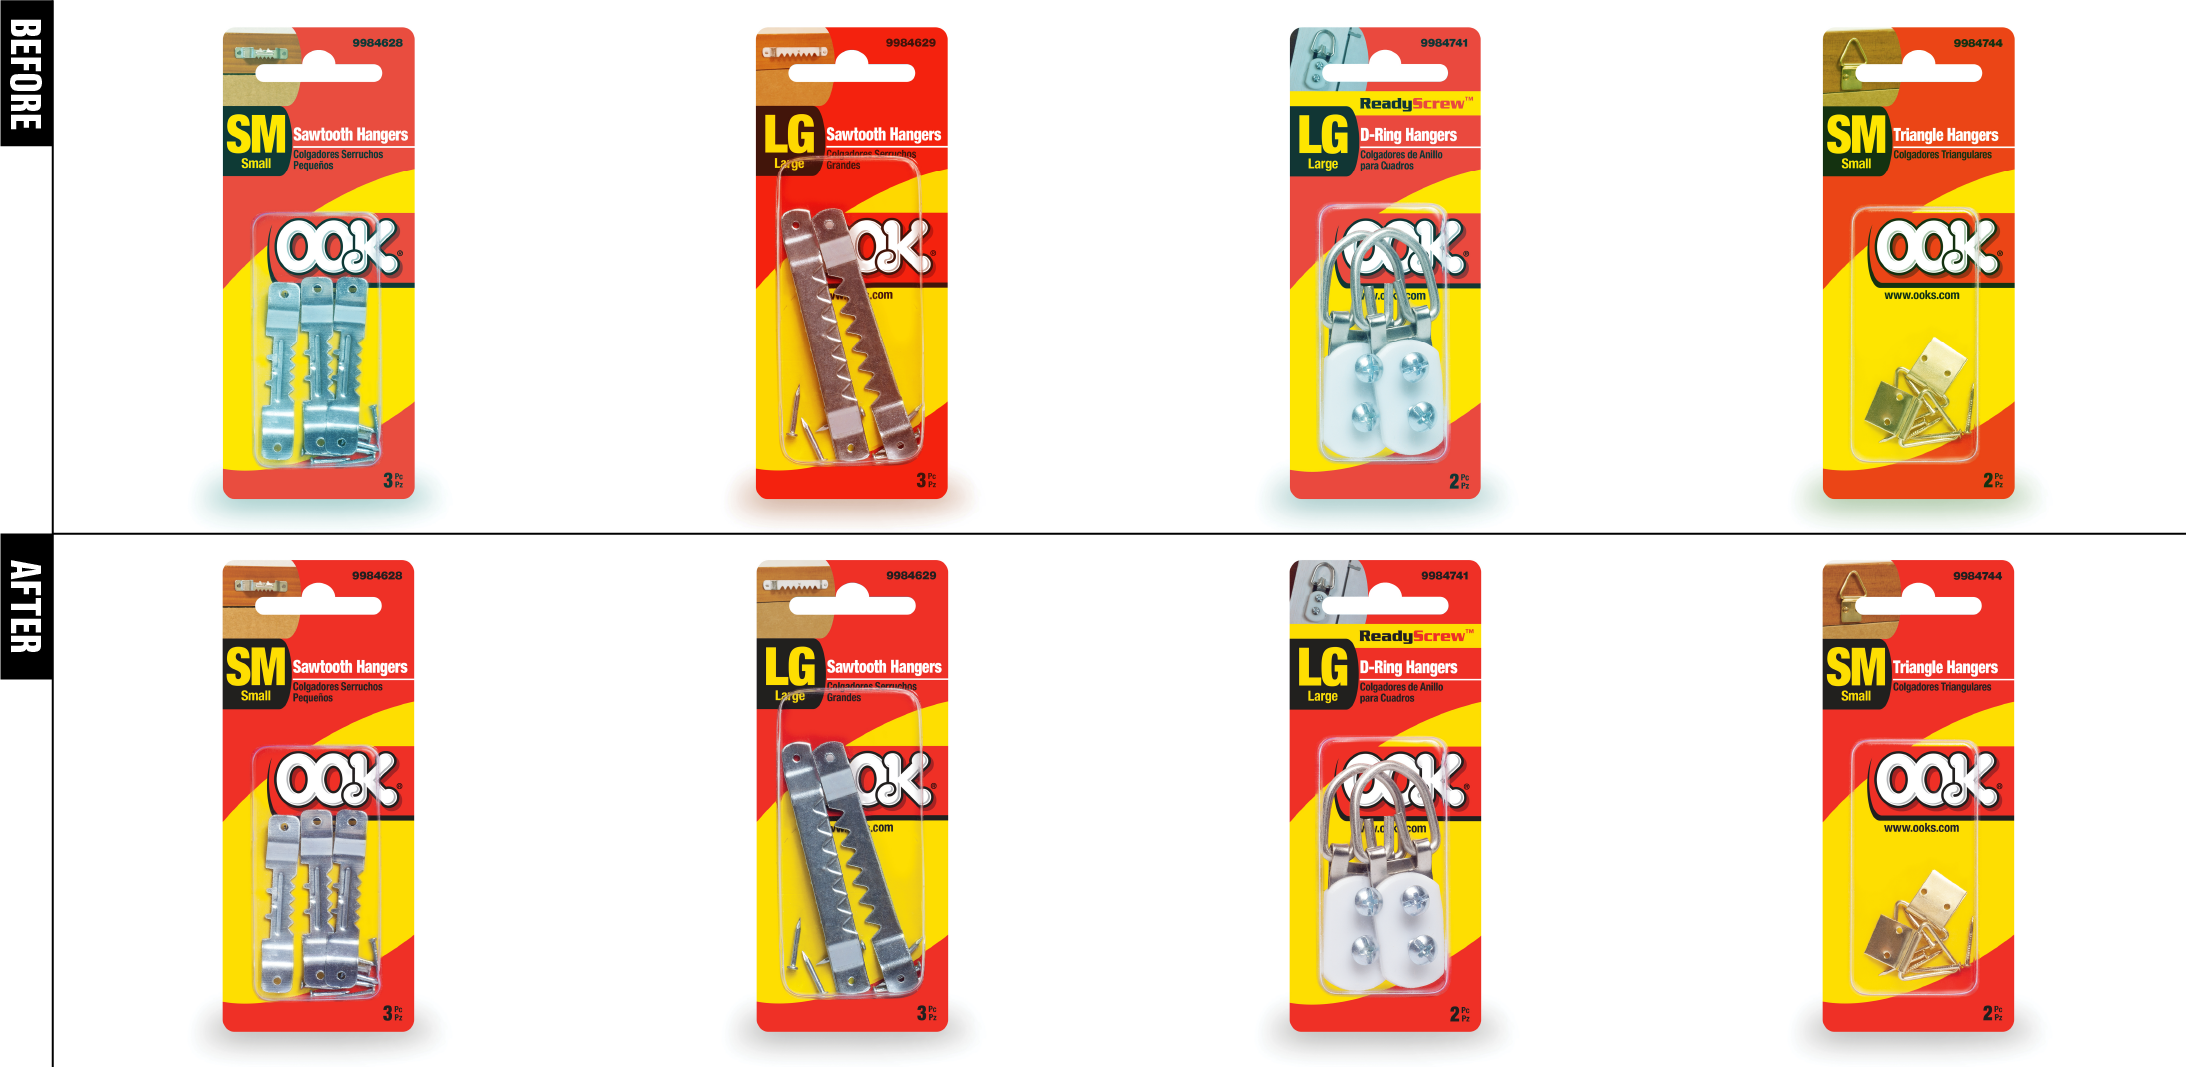
Color correction is like a mini makeover for your product: It’s your chance to highlight your product’s colors while keeping true to its color palette. As you can see with the OOK packaging, the result is a flawless, eye-catching look that’s ready to dazzle.
In the blink-and-you’ll-miss-it world of online shopping, first impressions are everything. Your product’s quality matters, no doubt. But it’s the presentation that grabs your potential customers’ attention. So, when you combine topnotch product photography with the magic of layered photographs and Photoshop, you’re not just catching eyes – you’re stealing the spotlight. In a nutshell, enhanced post-production photography is your ticket to turbocharged digital sales. Follow these simple tips, and your product images will be a magnet for customers. In the competitive world of online shopping, appearance matters, and post-production enhancement is your secret weapon. So, get ready to impress and watch those sales soar.